Draw a Circle to Surface in Rihno
Brand a Simple Faceted Hex Pendant in Rhino 3D
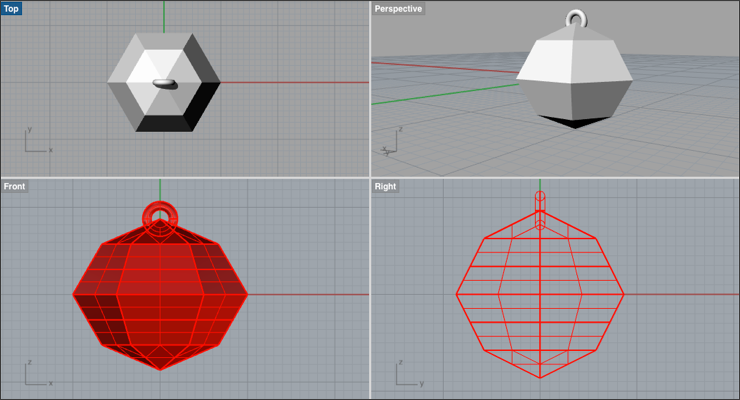
This tutorial will detail how to created faceted objects in Rhino using the Surface from iii or 4 Corner Points and the Polar Assortment command. You lot can turn these objects into pendants, earrings or embellishments for other projects.
Key Learning Points: Separate by segments, surface manipulation, polar array, torus
Pre-Requisite Knowledge: Viewport manipulation, layers, basic shape cosmos, ORTHO, OSNAPS.
Set-upwards Rhinoceros to create your model.
- Open up a new model in Rhinoceros. Use the default setting: Small Objects Millimeters.
- Create the following layers. Delete all unused layers.
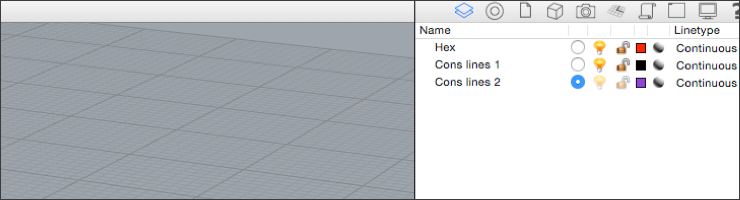
Create the reference geometry for your model. Begin with a hexagon xx mm in width.
- Select Cons lines i layer.
- Ensure Ortho is turned on.
- Go to Front viewport.
- Enter the Polygon command.
- Center of inscribed polygon: 0
- Num sides: 6
- Corner of Polygon: Input 10, printing enter, and drag the cursor straight to one side (left or correct). Click on the construction plane in this spot.
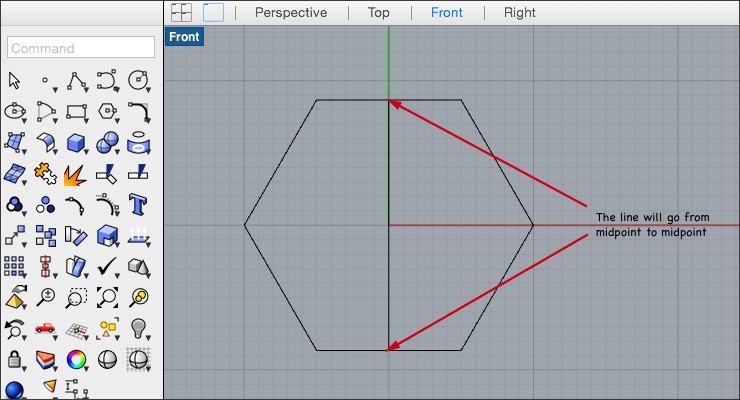
Create a line vertically bisecting the hexagon. The shapes we use to contour the facets will cutting through this line subsequently.
- Ensure Midpoint OSNAP is turned on.
- Enter the line command.
- Hover over the tiptop of the hexagon until the Midpoint OSNAP appears. Click at this signal. Drag the line down to the bottom Midpoint OSNAP.
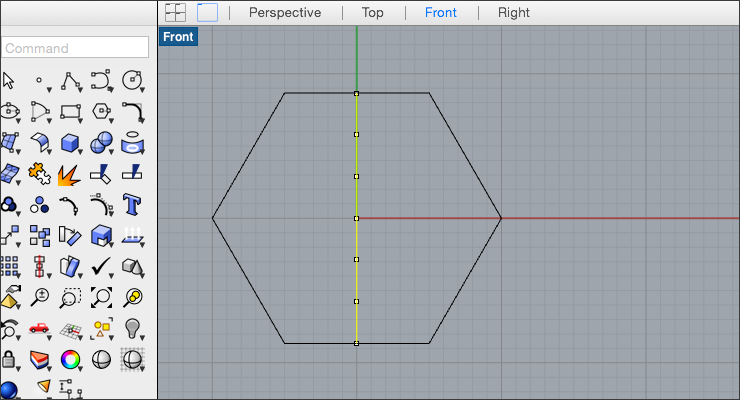
Split up the line into six segments for the 6 contour shapes we will brand to help form the facets of the hexagon.
- Select the line and enter the Divide command.
- Number of segments: half-dozen
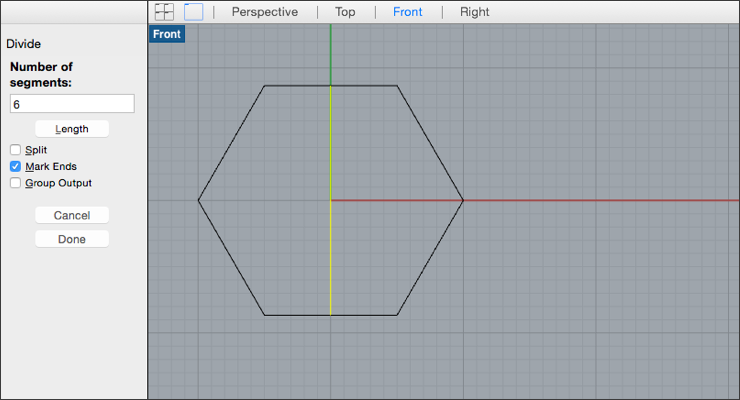
The line will be divided into vi equal segments.
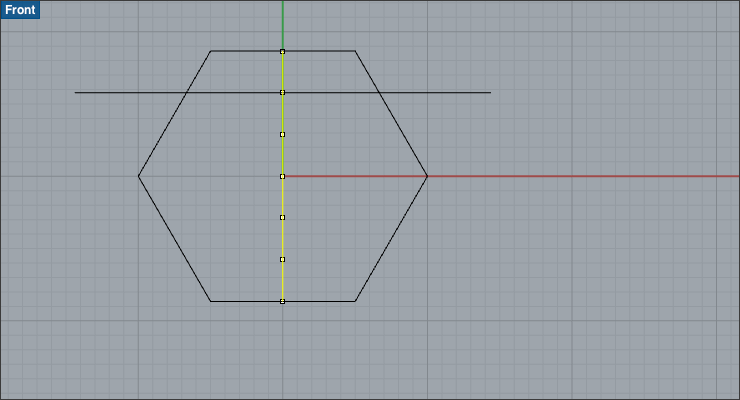
Draw contour lines out from each point. This will ensure we evenly place the contour shapes.
- Ensure the Point OSNAP is selected.
- Ensure Ortho is turned on.
- Enter the Line command.
- Select the Both Sides option.
- Hover the cursor over the first indicate within the hexagon until the Point OSNAP appears.
- Draw out the line through the sides of the hexagon.
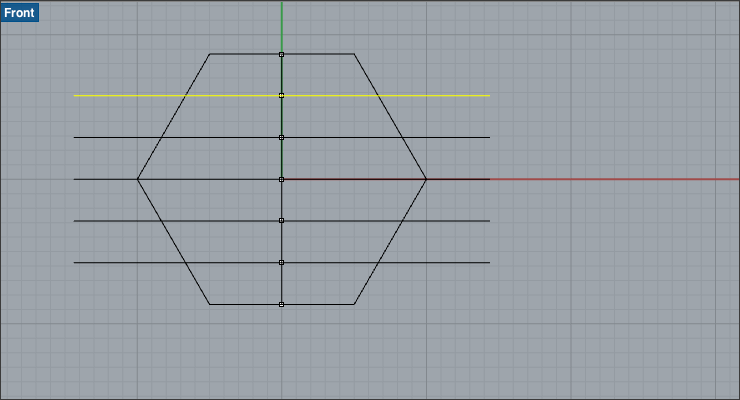
Copy the line to intersect the hexagon at each inside bespeak.
- Ensure Indicate OSNAP is selected.
- Ensure Ortho is turned on.
- Select the line. Enter the Copy command.
- Bespeak to re-create from: Hover over the line until the Point Osnap appears. Click at this spot. Re-create the line iv times to each of the interior points below. Snap to the points.
- Printing Esc to go out the control.
Create a polygon on each line. Nosotros will utilize these polygons to class the outline for the facets.
- Select the Cons lines 2 layer.
- Go to Perspective viewport.
- Ensure the Point and Intersection OSNAP's are selected.
- Enter the Polygon command.
- Center of inscribed polygon: Snap to the Bespeak at the center of the top line.
- Corner of polygon: Draw the cursor out and snap to the Intersection at the edge of the large hexagon and the profile line.

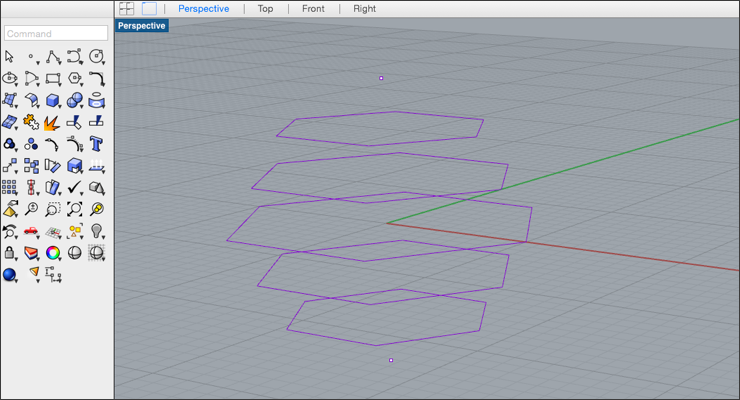
Echo the higher up stride for each line. There should be 5 smaller hexagons contouring the larger one.
Place a indicate at the midpoint of the summit and lesser of the big hexagon. The facets of the pendant will begin and end at these points.
- Ensure the Midpoint OSNAP is turned on.
- Enter the Point command.
- Hover over the top point until the Midpoint OSNAP appears. Click at this spot.
- Repeat the higher up steps and place a point at the bottom of the hexagon.

Turn off the Cons Lines ane layer. Just the ii points and contour hexagons should be visible.
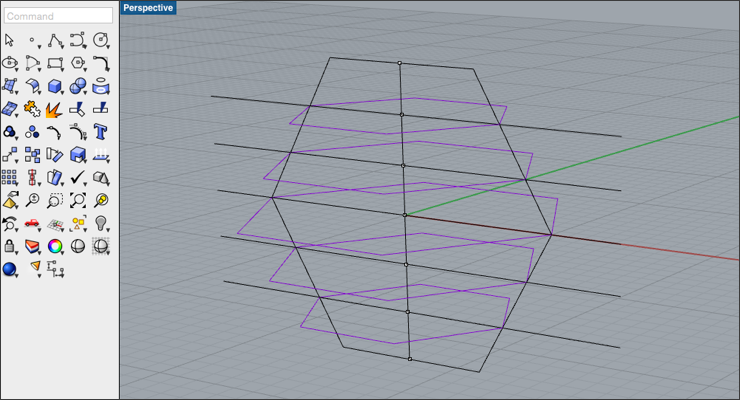
Use the Surface from three 0r 4 Corner Points command to map out the planes that will form the faceted hexagon.
- Select the Hex layer.
- Use Shaded Viewport Mode.
- Go to the Surface Creation flyout card on the left toolbar.
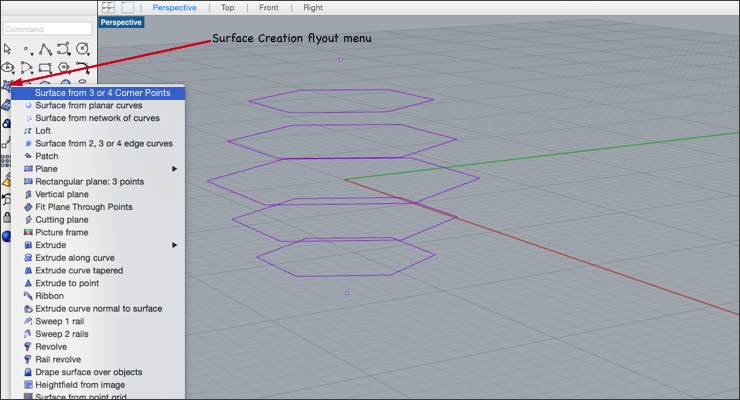
4. Ensure Point and End OSNAP's are selected.
five. Enter the Surface from three or iv Corner Points command.
6. Create a surface using 4 of the corner points of the hexagon equally shown below.
Repeat the same control 3 more times for the lower hexagons.
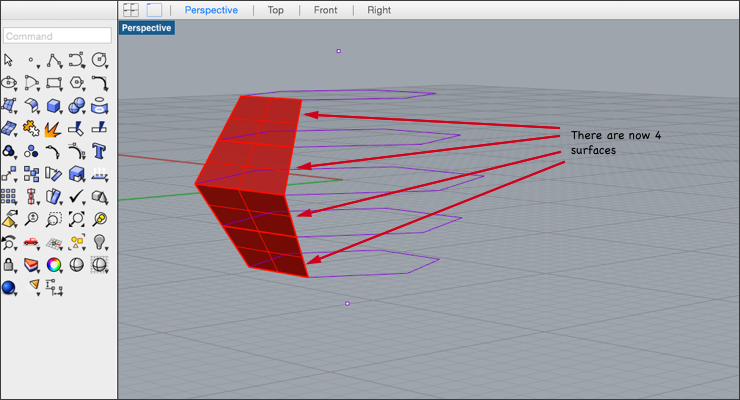
Create a surface using the point object on top.
- Enter the Surface from 3 or four corner points command.
- First corner of surface: Snap to the Point on peak.
- Second corner of surface: Snap to the End OSNAP on the surface directly beneath the point.
- 3rd corner of surface: Snap to the other End OSNAP of the surface below the point.
- Printing enter to create a 3-sided surface.
Do the same using the lower point.
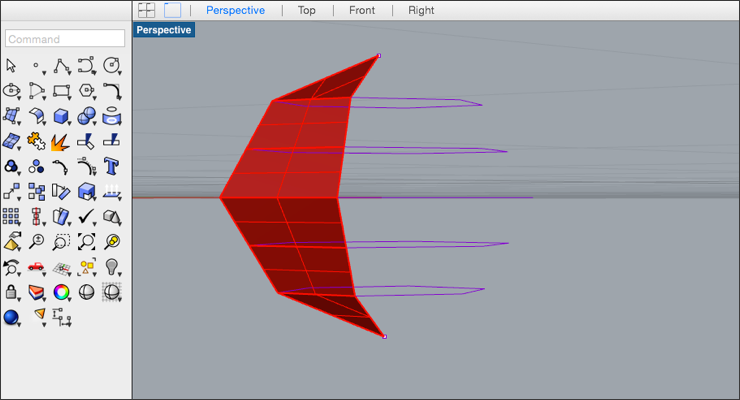
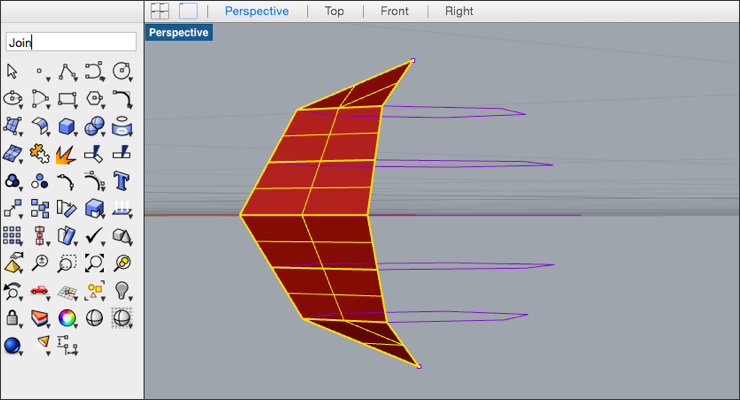
Join all the surfaces just created together.
- Select all the surfaces. Hold downward the Shift hotkey to select multiple surfaces.
- Enter the bring together command.
- The 6 surfaces will at present be joined into 1 single surface.
Finish the hexagon using Assortment Polar. The Array Polar command copies objects around a central location.
- Select the joined surfaces.
- Enter the Array Polar command.
- Center of Polar Array: Snap to the bespeak on top of the object.
- Number of items: 6
- Angle to make full or get-go reference point: Accept the default of 360 degrees. Press enter.
- Press enter to accept.
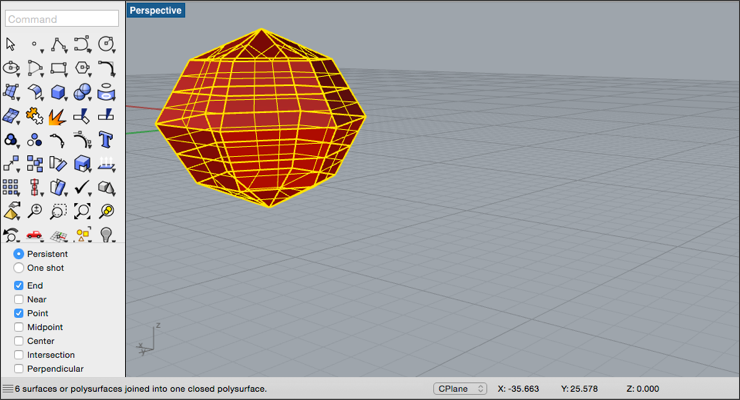
Join these surfaces into 1 polysurface to create the faceted object.
- Select all the surfaces.
- Enter the Join command.
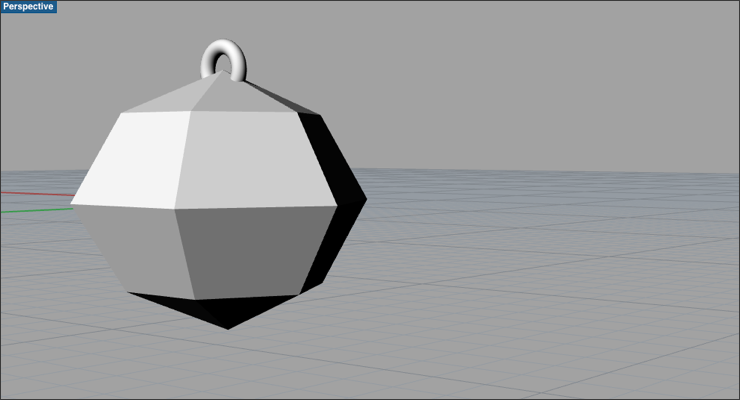
Create a fastening piece using the Torus command.
- Ensure End OSNAP is selected.
- Go to Forepart viewport.
- Enter the Torus command.
- Center of Torus: Snap to the Stop OSNAP on pinnacle of the hexagon.
- Radius: i.5, press enter.
- Second Radius: 0.5. Printing enter.
- The fastener volition now exist created in the center of the hexagon.

The faceted hexagon is at present consummate. View it in different brandish modes.
At present that your project is complete, salvage it. Try experimenting with other shapes, and number of facets to your liking.
- Get to File > Salve.
Source: https://drawingpost.com/make-a-simple-hex-pendant-in-rhino-3d-750bfe6e5096
0 Response to "Draw a Circle to Surface in Rihno"
Post a Comment